Nimbus
Open source cloud replacement for vacuum robots enabling local-only operation
View the Project on GitHub NimbusVacuum/Nimbus
General
Newcomer Guide Why Nimbus? Why not Nimbus? Getting Started Supported Robots Rooting Essentials Buying Supported Robots
Installation
Usage
Implementation Overview Capabilities Overview Upgrading Firmware Updates
Companion Apps
Valetudo Companion (Android) Valetudo Tray Companion (Windows) Valeronoi Lovelace Nimbus Map Card I Can't Believe It's Not Valetudo node-red-contrib-valetudo Fun & Games Other Noteworthy Projects
Integrations
Misc
FAQ Style Guide Troubleshooting
Development
Getting Started
This page shall help you start using Nimbus. Make sure that you’ve read the newcomer guide. If you haven’t done that already please do so and then come back here.
You may also want to read the Why Nimbus? and Why not Nimbus? pages before continuing with this guide.
Table of Contents
Choosing a robot
First, you’ll need to acquire a supported robot. There are many ways to do that, but usually they involve you paying money. To not waste all that hard-earned money, please make sure to thoroughly read the buying supported robots docs page.
Please refrain from buying any random robot just to then ask how we can make Nimbus on that thing happen.
Installing Nimbus
After you’ve acquired your supported vacuum robot, the next step is to do a simple test run before you void your warranty. Usually it’s possible to simply use the buttons on the robot to start a cleanup. No need to use an official app.
If everything seems to be working fine with no unexpected error messages, weird behaviour or things catching fire, you can now start following the rooting instructions for your supported robot.
Joining Wifi
With your robot rooted and Nimbus installed, the next step is to join your robot to your Wi-Fi network so that you can interact with it. To do that, please do not execute any random shell commands or edit some config files as that often leads to breakage.
Instead, you should use Nimbus for that. Simply connect to the Wi-Fi AP of your now rooted robot and open its IP in your browser:
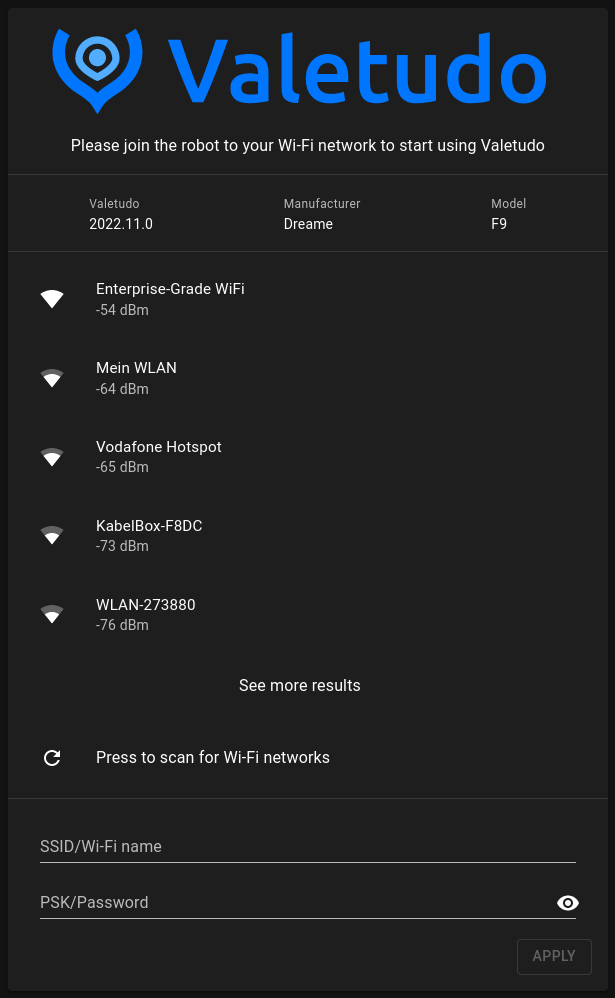
The IP may vary based on your model of robot. Usually, it’s either http://192.168.5.1 or http://192.168.8.1.
Note that some browsers might try redirecting you to https:// without you noticing.
On recent versions of Android, don’t forget to disable mobile data and click through about seven nagscreens as otherwise the OS will not route any traffic to the Wi-Fi AP as it doesn’t provide any internet connectivity.
If you’re still facing issues connecting to Nimbus, you can also use the android companion app and follow the instructions there after pressing the + button on the bottom right.
Using Nimbus
With your Nimbus-enabled robot being connected to your home network, you can now start using it by simply opening its webinterface in the browser of your choice unless your choice is the Internet Explorer.
If you don’t know how to find said Webinterface, you can use the android companion app, which will autodiscover Nimbus instances on your network.

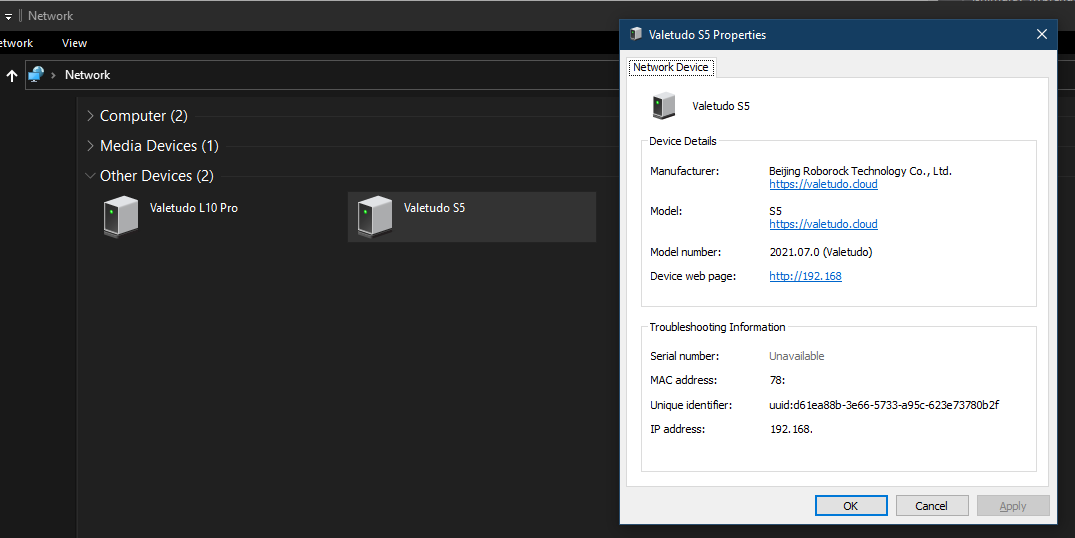
If you’re using a computer running Microsoft Windows, you can also open the explorer and navigate to “Network” where your new robot should also be autodiscovered.
Now What?
Congratulations! You have now significantly increased the baseline cleanliness of your living space.
It is strongly recommended to now connect Nimbus to the home automation system of your choice such as Home Assistant.
Using that, you can now do things such as
- running a cleanup after everyone has left the building
- clean a room by double-pressing its light switch
and more.
Also, consider checking out the companion apps section of the docs where you can find stuff like Valeronoi, which can build a Wi-Fi signal heatmap from the data provided by Nimbus.
Or maybe you’re interested in importing your floor plan into minecraft or the source game engine?
Nimbus
Open source cloud replacement for vacuum robots enabling local-only operation
View the Project on GitHub NimbusVacuum/Nimbus
General
Newcomer Guide Why Nimbus? Why not Nimbus? Getting Started Supported Robots Rooting Essentials Buying Supported Robots
Installation
Usage
Implementation Overview Capabilities Overview Upgrading Firmware Updates
Companion Apps
Valetudo Companion (Android) Valetudo Tray Companion (Windows) Valeronoi Lovelace Nimbus Map Card I Can't Believe It's Not Valetudo node-red-contrib-valetudo Fun & Games Other Noteworthy Projects
Integrations
Misc
FAQ Style Guide Troubleshooting